AWS Page
This guide walks through setting up dedicated GPU resources in your AWS account and how to use those GPUs for your workloads that need the GPU’s power.
In AWS, the specific instance types automatically have GPU resources as a part of it. EC2 P2, and P3 instances are good options for most use cases. In the below example, we use p2.xlarge - 4vCPUs.61GB.1GPU.
Pre-requisites
- Argonaut account
- AWS account and VCS connected
- Apps on your Git that can take advantage of the GPU
Provisioning Cluster
- From the sidebar, go to
Environmentsand clickEnvironment +to provision a new environment in your chosen region. - Once the environment is created, click on the
Infratab and clickResource +. - Choose EKS (Kubernetes cluster)
- Set up separate Node groups with CPU-only resources and one with GPU. (If you only need GPU-enabled nodes, just create one node group with GPU enabled).
- Choose a compute instance with GPU and set the other parameters. Here, the
GPUnodeshave both p2.xlarge instances with both CPUs and GPUs. TheCPUnodeshave t3.medium with only CPU resources.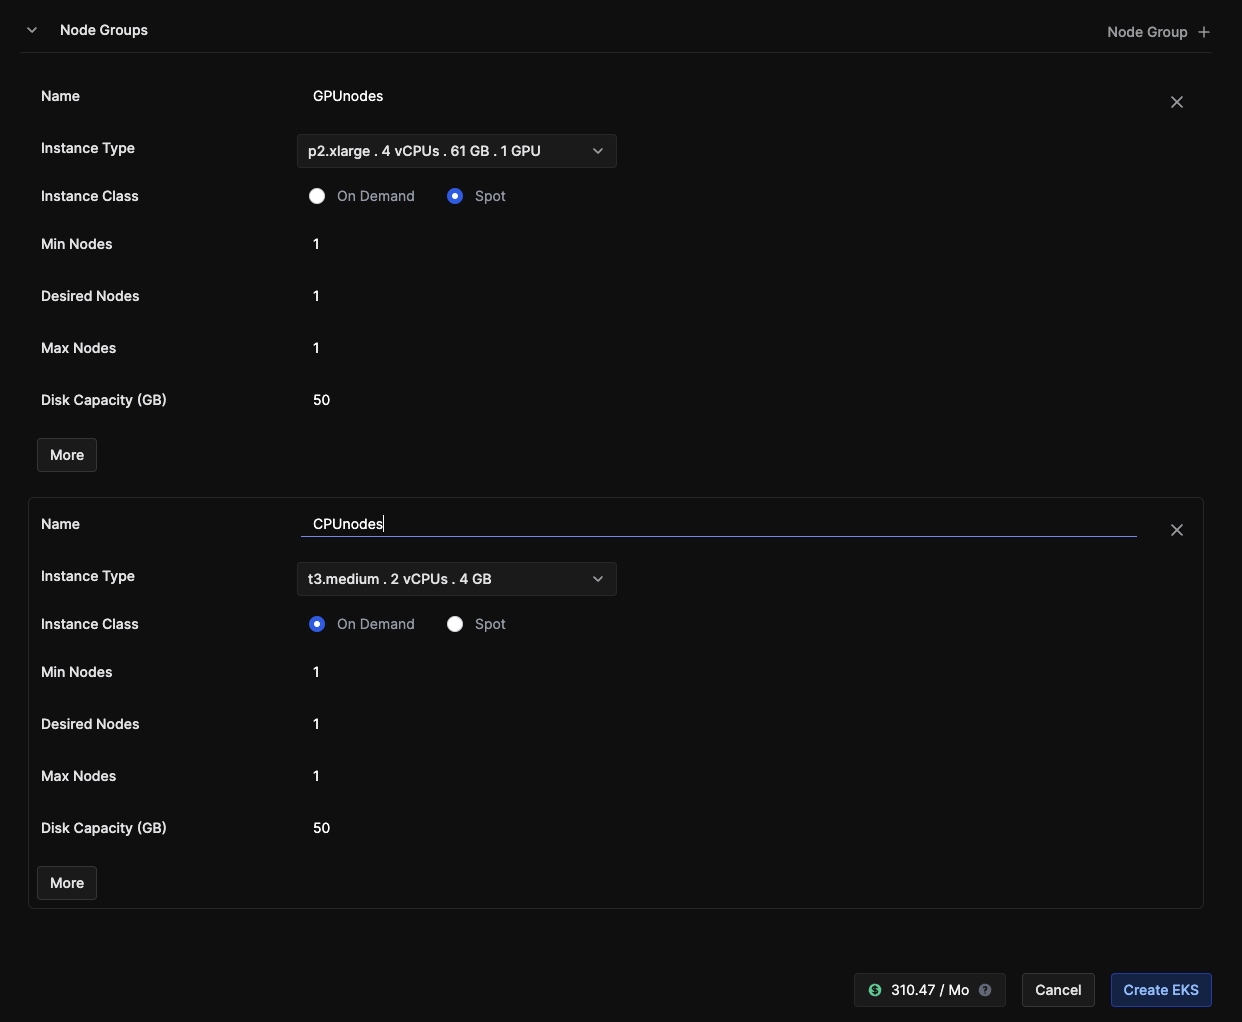
- Click
Create EKS, and your node groups will be deployed in your cluster.
Now that your cluster is ready, it’s time to deploy your application and enable the nodes that can make use of the GPU resources.
Deploying an app
While deploying your app, you have two steps: build and deploy. Your git provider handles the build step through GitLab CI or GitHub Actions. The deployment step is handled by ArgoCD.
- Go to the applications tab on the left.
- Click on
Application +. You can now set up multiple pipelines for your application. - Create
Pipeline +to build a new pipeline. - Enter the build step, choose your repo, and configure the build details
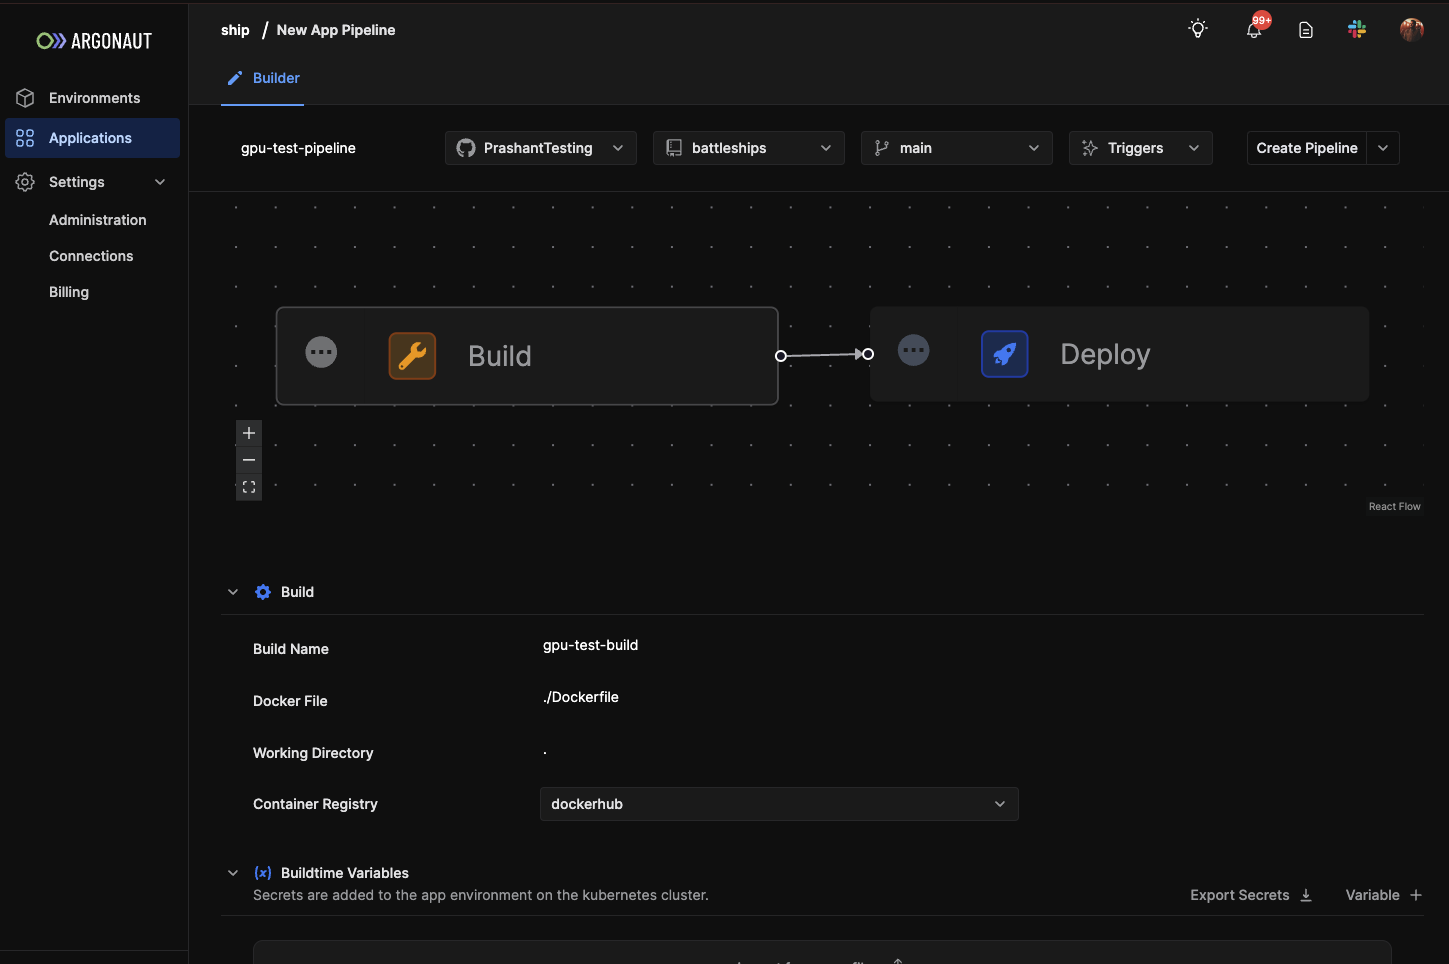
- Select the Deploy step. Choose which environment and cluster it gets deployed to.
- Add any runtime variables, secret files, etc.

- You can then update network services, autoscaling, and storage.
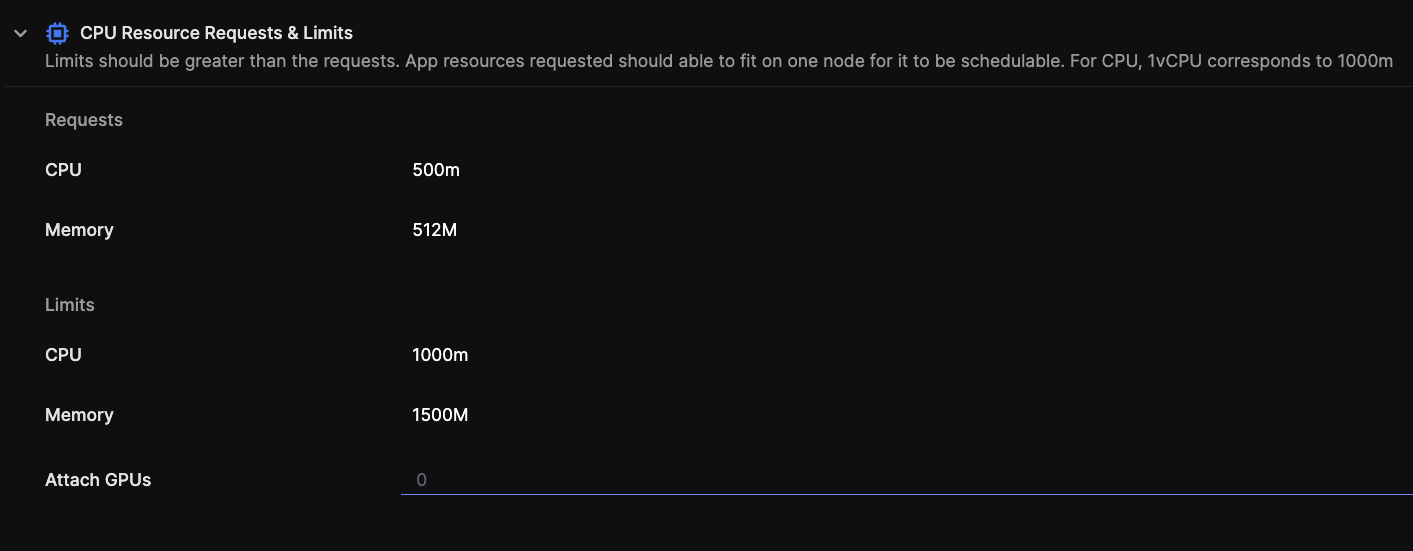
- As a last step, you set the CPU and Memory requests and limits, and the number of GPUs to attach.
💡 Note: Attach GPUs number <= Number of available GPUs in your instance (refer to EKS resource in your environment to see how many GPUs you have provisioned)
- Click on Create Pipeline, and your app is deployed.